
Create The Dark Knight Logo
Lets me also state that all Batman Logo’s and Images are trademarks of DC comics and Warner Brother Pictures, you cannot re-sell them, or use them for any commercial purposes. This tutorial is simply using it for a free and legitimate learning experience. For this tutorial we’ll be getting our feet wet in both Illustrator and Photoshop. Illustrator will produce a re-usable and flexible vector “Batman Logo” and Photoshop will dress it up with the effects.
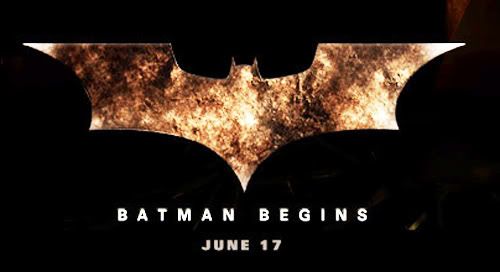
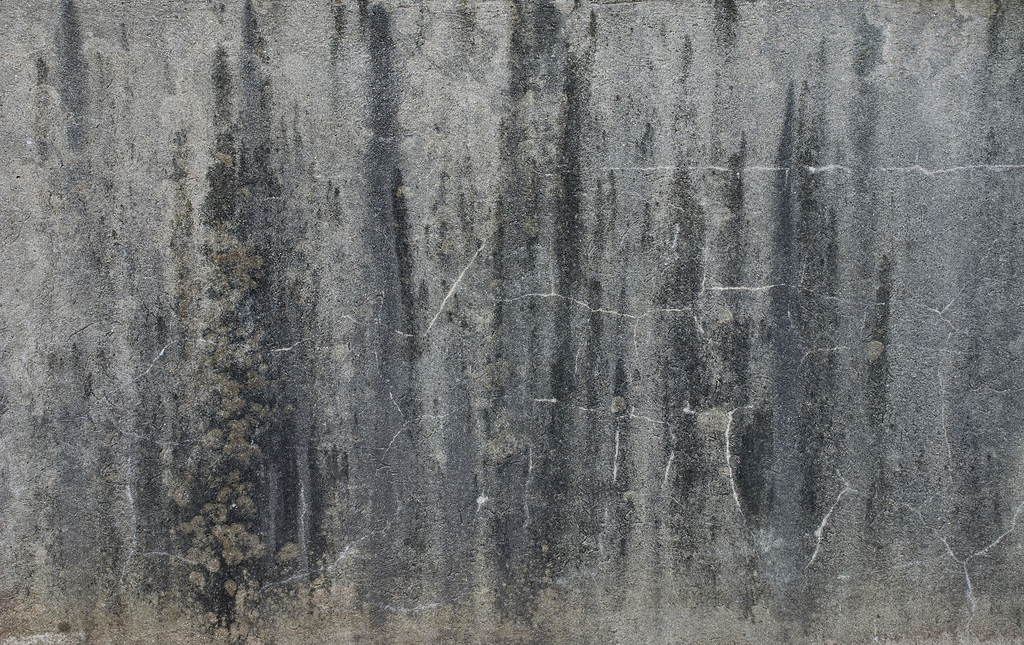
Materials: To complete this tutorial you’ll need some weapons for your arsenal. Batman Begins Logo (Sized and brightened)The “Gotham Grunge” Texture (Modified from a Bittbox Concrete Texture)A Reference photo (just for a general look)
Step 1 – Tracing in IllustratorJump to: Step 1-Step 2- Step 3-Step 4- Step 5
Now Open a new illustrator document 5”x5” and begin the tracing of it, I’ve included a reference video of my work so you have a better idea of the general process. Remember you only have to trace half of the image, as illustrator can duplicate and combine the two halves.
Now I took some extra time not included in the video where I scaled the bat to look a bit more like it’s slightly Sleeker “Dark Knight” incarnation, you can check out here.
I save the logo in Illustrator CS3 format, so that I can import it as a PDF and a Smart object into Photoshop, this allows me to use size and effects at will, and not have to worry about quality.
Step 2 – Setting the Stage and basic effects.Jump to: Step 1-Step 2- Step 3-Step 4- Step 5
After saving your bat design in Illustrator Lets open the “Gotham Grunge” texture in Photoshop, this is great for two reasons. First, it allows us to not have to worry about the document size, and we’ve already got our background layer ready to go. You can just make a blank template but you’d have to place in the texture in anyway and size it.
Make 3 copies of the background layer, name them “Background” “Gotham Grunge” and “Grunge Shards”. Why do we need three copies? Stop asking questions and do it! You can hide all but the background layer now.

batman02.jpg
Once the Documents open, you can adjust the brightness and contrast of the "background layer" you can match this box from Image>Adjust> Brightness and Contrast

batman03.jpg
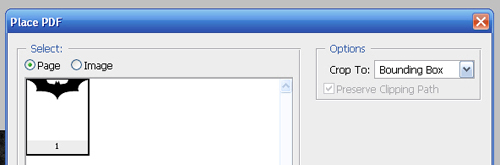
Now place in our Bat with File> Place, and crop it to the bounding box.
batman05.jpg
Once you’ve got you bat in the belfries we need an outer glow, I like to color him red at first (especially with a dark monitor for viewing purposes) lets apply that filter, Along with a blue inner glow (#56A2FF). You can use these images for reference:

batman07.jpg

batman08.jpg
Step 3 – Bursting and BlurringJump to: Step 1-Step 2- Step 3-Step 4- Step 5
Now, using white and very light blue lets make two new layers,(name them “burst” and “blue burst”) with the first new layer (burst) still selected, hold down the control button on your keyboard, and click on the “bat” layer, this should give you an automatic selection of the bat layer, ready to be filled on the new “burst” layer. Using the very light blue and white, lets fill the new layer with Filter> Render> Clouds

batman10.jpg
Do the same on the second layer (blue burst) this time with a darker blue, more like the #56A2FF. Again, Filter>Render>Clouds Now we need to “explode” these glows, apply a radial blur with Filter>Blur> Radial Blur and use these settings, do this to both layers “burst” and “blue burst”.

batman11.jpg
batman12.jpg
Not scale up the “blue burst” layer so that it’s larger than our bat by bout 20% the real scale doesn’t matter, whatever looks good to you.

batman13.jpg
You can then move the “bat” logo layer above “burst” and “blue burst”. The result looking a bit like this:

batman17.jpg
To finish off step 3 we’re going to make a copy of out bat logo layer, and give it a motion blur in the default angle of about 6 pixels, you can remove the “outer glow” from the copy layer, and keep the “inner glow, make it semi transparent or not, it’s up to you.
You’ll go from a bat like this:

batman21.jpg
To a bat like this:

batman23.jpg
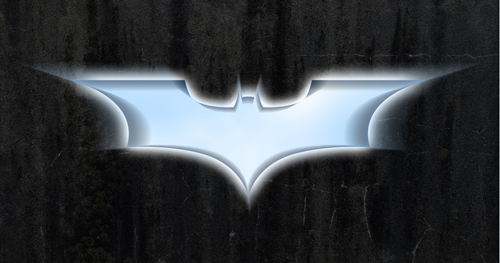
Step 4 – We’re going Streaking!Jump to: Step 1-Step 2- Step 3-Step 4- Step 5 It’s time to “streak up” and dirty our design, take the “Gotham Grunge” layer and put it behind the bat logo but on top of both “Burst” layers keep the opacity at 100% and change the mode from “Normal” to “Soft Light”. I keep speaking about layers, but here’s a clear outline of what things should be looking like layer-pallet wise on your end.

batman29.jpg

batman27.jpg
With our new “dirty glow” in the background we’ve got to add some streaks, make a new layer, name is “Spikes” and put it above the “Gotham Grunge” layer and under the “Batman Logo” Layer using the paint bucket fill the whole layer with white:

batman30.jpg
Time to get some help from a Photoshop Filter>Stylize> Extrude. You can use these settings:
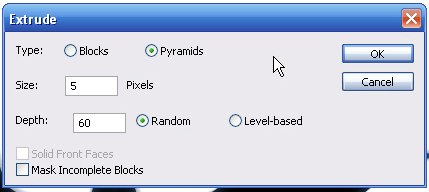
batman32.jpg
Holy Sharp Objects Batman!

batman33.jpg
Set the Spikes layer opacity to 100% and change it from “Normal” mode to “Linear light” mode. (You can use whatever mode makes you happy though.) Now take a soft eraser, turn down the hardness all the way, and begin erasing the spikes layer. Leave the spikes around the glowing area I’ve included a quick reference video for erasing the spikes layer with a soft eraser:
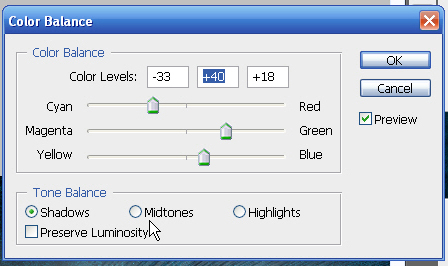
Once you erase the “Spikes” layer it’s time to Color Balance with the following properties: Shadows: 0 : 0 : -18 Midtones: -46 : -8 : +38 Highlights: -10 : 0 : 0Step 5 – Shards and HazeJump to: Step 1-Step 2- Step 3-Step 4- Step 5 Finally! It’s time to use that “Grunge Shards” layer I made you create so so long ago. I told you not to question it and it paid off, you’re welcome.

batman40.jpg
Make the new layer semi transparent, so you can see the design underneath, and using the Polygon Lasso tool begin making random shapes, smaller the closer you are to the bat logo. You can hold down the shift cotton on your keyboard to make all the shapes at once.
Once you’ve got all of your shapes done right click on the canvas, and “select inverse” then delete away the rest of this layer. Note I’ve made all of the shapes roughly in perspective so they have a “Flying away” look.

batman42.jpg
Once your shapes are cut out, use the Image>Adjust> Brightness and contrast to darken up the layer, this time make sure you are using Legacy settings.

batman44.jpg
Apply a motion blur to your “shards” (Filter>blur>Motion Blur) with the settings below.

batman45.jpg
Finally make one last layer called “overglow” in “Screen” mode with 100% opacity. Take a paint brush and use the top bar to set the flow to 13% and painting with very light blue, “haze up” the design, Keep this layer under your shards layer.

batman47.jpg
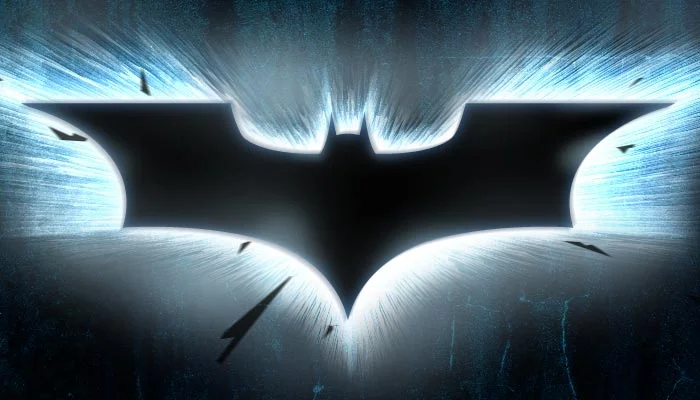
That’s it! You’re done! Season to taste! I’ve changed the background layer with some color adjust. Take a look at the settings:
batman50.jpg

batman51.jpg
Great job, now go and do your own things! Send me an e-mail with different ideas and looks you have for the batman logo, you can download the vector file I traced here.